by - Jennifer D.
6.) Shading pt 2.
More shading~! To give more depth to your picture, you're gonna layer on another set of shades over the current shades. See image below.
Now repeat and layer on more shades.
7.) Highlighting
AS you can see, I have added more shading, and added highlights. See image below..
Like the shading, continue to layer on the highlights.

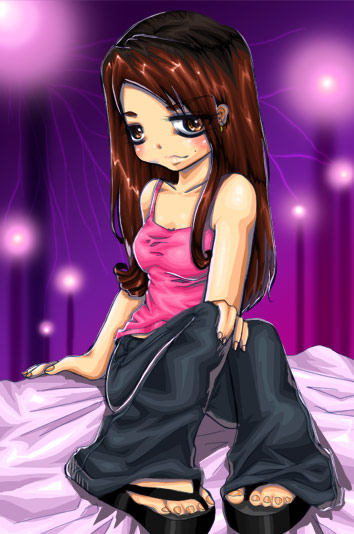
When you're finished, you will get something like this:
This method works really well with hair, the more you layer on the highlights, the shinier the hair will be~ Don't overdo it on the clothing unless you want really shiny glossy clothes. (o.O Sassy~! )
8.) Eyes
For the eyes, you basically use the same layering method of shades and highlights. You want the top to be shades and the bottom part of the iris to be highlights. In my picture, you won't really see it much, since I did most of the shading when I did the inking. I usually keep the eyes empty and shade with color.
9.) Color atmosphere shading
Oo, is your picture in a dark setting? And you want to add in shading that will match the objects surrounding? It's easy~! It's basically using the layering method again, except you're using a different color. For my image, the dominating color is purple. So added in some purple shading on the subject.
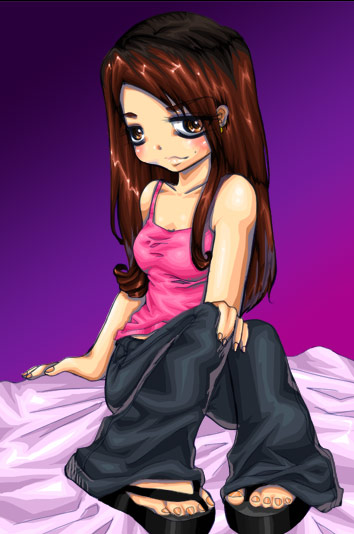
From here, just paint in, or color in your background. =D
10.) Color atmosphere highlighting.
Since there are now bright purple lights in the back, it makes sense to add some highlights. (*Note I'm not accurate on shading and highlight. So don't bite my head off for this. =p Besides, if you know better, why are you looking?! lol). So I took a bright tint of purple and highlight areas which I thought the light would reflect off of.