|
![]() |
|
High Tech Button | ||
|
||
![]() |
1) New Document, Grab the Elliptical Marquee Tool (M) using the shift key draw a round circle fill it with blue here I used hex: #00AEEF. |
|
![]() |
2) Select the round circle then create a new layer. Use the mouse right click on the empty selection and choose stroke setting: ( 6px, inside and white as color) press ok then go to Filter --> Blur --> Gaussian Blur setting 3.2 press ok. Change the layer effect to soft light and adjust the opacity of the layer to 50%. | |
![]() |
3) Go to the original circle layer and load its selection, then create a layer go to select --> Modify --> Contract and contract it by 3 pixels. In the empty layer right click and choose stroke and use these settings 4 px, inside, and white color with the selection still loaded go to Select --> Modify --> Contract by 1 and gaussian blur it by 2. | |
![]() |
4)
Blur the selection twice and then erease the lower bottom to give it the fade effect. |
|
![]() |
5)
Duplicate the layer, Grab the Gradient Tool (G) Set the foreground color to white then change your gradient option to "foreground to transparent" then apply a vertical gradient starting from the top of the selection to the center of button check image. |
|
![]() |
6)
Make a circle with a darker 
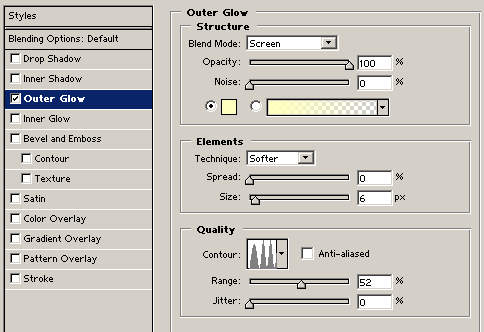
blue. Check the image for the blending and contour. |
|
![]() |
7)
Make a small circle inside it, 
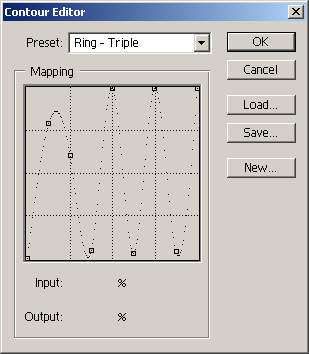
then play around with it with different blending till you get something you like. |
|