Photoshop to vector
nebula photoshop tutorial
by - Fadai Kamjar

In this tutorial you will learn how to create a nice nebula in photoshop cs, with realistic gas clouds. Before you start you have to have some brushing skills, because we are gonna brush pretty much. And you have to make a brush with the clouds texture.

You can do that in this way:
First pick a normal soft brush and then open the "brushes window". Use the settings given above. Now you will see you get a kind cloudy brush. Save the brush by clicking on the new layer button button. Give a name and click ok. (_ view image _)

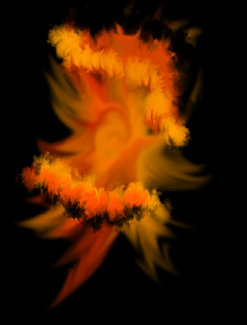
Now we can begin making the nebula. Make a 600x800 sized image, and color the background black with the paint bucket. Now make a new layer. Pick a fuzzy brush and draw some colors and stuff. Now pick the smudge tool and smooth it all a bit. You will now get something like this. Yes I know, it looks weird but this is just a bg color. (_ view image _)
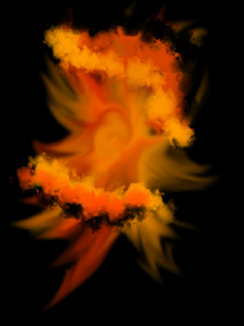

Now pick your clouds brush and make some gassy clouds with colors on you color bg we just made. The clouds should look like this: black color from the middle in the middle from the clouds you have to make it the color you want, and the color that is facing the middle should be more like highlighted. This is pretty easy, it doesnt have to be like mine, you can make different shapes.
 

Now pick the smudge tool and smudge the clouds. Size : 5 or lower if you want it more detailed, strength must be somewhere near the 50/60%


Now you have to more like drag the colors of the clouds and take them in each other something like this. we are gonna use this technique pretty much, it gives the clouds a bit thickness.
 

Now we are gonna make the center lightsource, make a new layer and use the paint bucket to make in whole black. go to filter -- render -- lensflare. Make a lensflare right in the middle so you just get a nice round shape, the brightness must not be to bright, just somewhere near 60.

Now you have to set the layer mode to screen. go to filter -- blur -- gaussian blur and blur the lensflare this way so you dont see the lens shapes anymore.

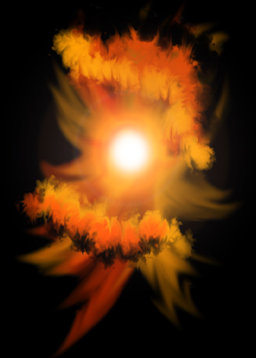
Make a new layer and pick a round soft brush as big as the center of the lensflare and use it on the lensflare and give it an outer glow. (you can choose the color but it must fit to the nebula) if you done that you get something like the image in the right.


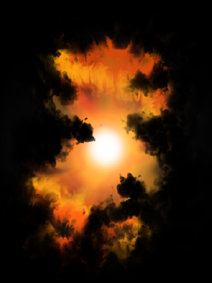
Now we must already start making the outer clouds, in this way you can see how the nebula looks like a bit and start detailing it. make a new layer and just pick the clouds brush and draw the shape you want in black , use the brush opacity on 30/40% and make it on someplaces a bit more darker.


If you done that you have to make a new layer below the black clouds you are gonna give the clouds a bit depth, pick a color, I picked a bit orange/red color. Set the opacity on 30 and go make a bit colored clouds under the black ones. Look at the image at the left of this text to see the example:

The next step is to smudge the black clouds now this will give the clouds thickness, and it looks nice.

 
Now we go inside the clouds again we are gonna add planets and stars in the nebula cus it looks so empty now. You have to make a new layer under the lensflare. Now pick a 1 px round brush and start making little stars with the color white opacity on 30% so you get random stars. I know this will take a while but its worth it. Now you can also add some planets to it, its not worth to make whole planets and put them in your work. You also can just use the Eliptical Marquee Tool and make little circles, and then brush in them. You have to make sure you also make the shadows on the planets. This you also can do with the brush tool. Just pick a soft brush as big as your planet, use black and just draw the shadow in it. It's that simple. Now the final step in this tutorial is improving the lensflare. Click on your most upper layer. Then use the rectangle tool to make a realy thin rectangle the color must be black set the layer to lighten. (_ view image _)
 
If you done that open the layers blending option...use the settings I did you can see them at the image.Now you get a gradient line that shows the light flare but still not finished you have to brush the lensflare still a bit otherwise it looks a bit fake. If you got something like mine you have to link the rectangle layer and this one with each other and go to layer - merge linked (ctrl+e)
(_ view image _)

Now you can make a layer above it and give a glow to the flare with your brush. (_ view image _)

Well the tutorial ends here guys. But you can always add new things in the nebula and detail the nebula more. I kept it easy cus its a tutorial...but you can make more and more layers. Make the nebula endless. This here is what I have got while writing my tutorial I hope this tutorial has helped you with your art.I wish you good luck with your work. (_ view final image _)
 
PS: Photoshop tutorial written with the permission of the Author!
Fadai Kamjar