by - filt3r
 |
|
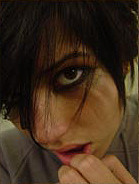
Step 1: You make a copy of your background layer. Insert the texture in between them. Now you can play with the blending modes of the layers. Here I chose soft light for the copy of the face and linear light for the texture. Experiment since different modes can really change the image. Step 2: Here you'll probably want to play with the hue and saturation of the image. (Image > Adjustments > Hue & saturate. I used 177, 7,0 for a blue/green tint.

You'll probably notice the image doesn't look the best right now, that's ok you have to get through the "messy" phase of most art.
Step 3: Right now you have access texture around on the clothes and stuff, while this may sometimes look cool to give a grainy effect, here I opted to get rid of it. Whenever you are going to erase USE MASKS!! Don't use the eraser. This way you can always go back and fix your mistakes. To make a mask click the circle with the square around it on the layers pallet. Use a black brush to erase things.

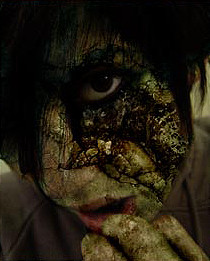
Okay, now that you've cleaned up the image a bit it's time to make it a bit more dynamic. To do this you'll use one of my favorite tools, dodge and burn. Do your highlights on the top portrait layer. This is great for quick highlights and adding a sense of depth. Darken and lighten areas, especialy those near cracks, make the areas above light and the deep parts darker. Just don't go too overboard. Now she looks like a well dressed zombie. I think it's time to add some torn up skin.

Step 4: Select the texture layer, now using the magnetic lasso tool, encompass the sunk-in part of the face. Zoom in the get it really close. Now go back to the hue saturate box and I put in 0,7,0 for a light fleshy red. After that I used a cheesy lighting effect on the bottom layer to sort of block out the
clothes. There are better ways to do that but i'll let you figure that out yourself.
Alternate examples at the bottom.
